
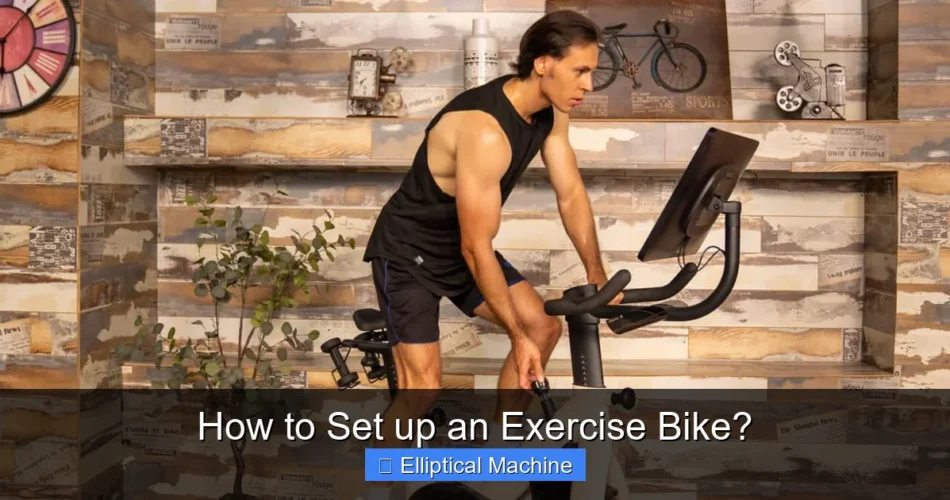
How to Set up an Exercise Bike? involves a straightforward yet crucial process that ensures comfort, safety, and effectiveness during your workouts. Properly adjusting your stationary bike is paramount for an optimal riding experience and to prevent injury. This guide will walk you through the essential steps for configuring your new fitness equipment.
Taking the time for correct exercise bike setup from the start can significantly enhance your fitness journey. Whether it’s a brand new piece of equipment or you’re simply refining an existing one, mastering this technique will lead to more efficient and enjoyable sessions.
Quick Answers to Common Questions
How do I set the correct seat height on my exercise bike?
To find your ideal seat height, stand next to your exercise bike and adjust the seat so it’s level with your hip bone. When seated, you should have a slight bend in your knee at the bottom of your pedal stroke, avoiding full extension.
What’s the best position for the handlebars on my exercise bike?
Adjust the handlebars so you can comfortably reach them without straining your back or neck. A good starting point is often the same height as your seat, but feel free to adjust up or down for your personal comfort and riding style.
How should my feet be positioned on the pedals of my exercise bike?
Ensure the ball of your foot is centered over the pedal spindle, then tighten the straps snugly so your feet feel secure but not uncomfortably restricted. Proper foot placement is key for efficient pedaling and preventing discomfort on your exercise bike.
📑 Table of Contents
Unboxing and Initial Assembly
The journey to an effective workout begins the moment your exercise bike arrives. While some bikes come partially pre-assembled, understanding the initial steps of putting it together is fundamental to ensuring its stability and longevity.
Gathering Your Tools
Most exercise bikes come with basic assembly tools, typically a multi-wrench and an Allen key set. However, having your own adjustable wrench, a Philips head screwdriver, and perhaps a rubber mallet can make the process smoother and ensure tighter, more secure connections. Always consult your bike’s specific instruction manual, as it will list the exact tools required.
Unpacking and Inventory Check
Carefully unpack all components from the box. Lay them out in an organized manner, perhaps on a clean mat or blanket to prevent scratching your floor or the bike parts. Immediately cross-reference every item against the parts list provided in your manual. This critical step ensures no pieces are missing before you begin assembly, preventing frustrating delays later on.
Attaching the Stabilizers
The base stabilizers are often the first components to be attached. These typically bolt to the main frame of the bike, front and rear. They provide the foundational stability. Ensure these are securely fastened, as any wobble here can compromise the entire structure. Many stabilizers also feature leveling feet; adjust these once the bike is fully assembled and placed in its final spot to eliminate any rocking on uneven floors.
Mounting Pedals and Handlebars
With the base secure, the next steps involve attaching the main interaction points: the pedals and handlebars. These components require careful attention to detail for both safety and ergonomic reasons.
Pedal Installation
This is a common point of error. Pedals are almost always marked ‘L’ for left and ‘R’ for right. Crucially, the right pedal (when facing the bike from the front) tightens clockwise, but the left pedal tightens counter-clockwise (reverse threaded). This design prevents them from unscrewing during use. Apply a small amount of grease to the pedal threads if recommended by the manufacturer, then hand-tighten each pedal before using a wrench to secure them firmly. Over-tightening can strip the threads, while under-tightening can lead to the pedal falling off during a workout.
Handlebar Assembly
The handlebars usually attach to a vertical post, which then slides into the bike’s main frame. Ensure the handlebar post is inserted to the minimum insertion line, if present, for safety. Fasten any bolts or knobs designed to secure the handlebars in place. Some bikes offer adjustable handlebars (up/down, fore/aft), which you’ll fine-tune in a later step.
Attaching the Console
The console typically mounts directly onto the handlebars or a dedicated console post. Connect any wires originating from the bike’s frame (for resistance control, cadence sensors, or heart rate monitors) to the corresponding ports on the back of the console. Be gentle with these connections to avoid bending pins or damaging wires. Once connected, secure the console with its designated screws or clips.
Adjusting for Ergonomics: The Seat
The seat is arguably the most critical component for comfort and injury prevention. A poorly adjusted seat can lead to knee pain, hip discomfort, or an inefficient workout. This phase of the bike’s configuration is highly personal.
Seat Height Adjustment
To find the correct seat height, stand next to your bike. The top of the seat should roughly align with your hip bone (iliac crest). Alternatively, sit on the bike and place your heels on the pedals. At the lowest point of the pedal stroke, your leg should be almost fully extended, with a slight bend (about 25-30 degrees) at the knee. If your hips rock to reach the bottom of the pedal stroke, the seat is too high. If your knee is excessively bent, it’s too low. Adjust the seat height using the quick-release lever or knob and ensure it’s tightly secured before riding.
Fore/Aft Seat Positioning
Many exercise bikes allow you to move the seat horizontally (forward or backward). To set this, sit on the bike with your feet securely in the pedal straps, and position the pedals so they are horizontal (3 o’clock and 9 o’clock positions). Drop a plumb line (or hold a string with a small weight) from the front of your kneecap. It should ideally pass directly through the ball of your foot, or slightly behind it. Adjust the seat forward or backward until this alignment is achieved. This ensures your power is transferred efficiently through the pedals and reduces strain on your knees.
Proper Cycling Posture
Even with the seat correctly adjusted, your posture matters. Aim for a neutral spine, avoiding excessive rounding or arching of the back. Your shoulders should be relaxed, not hunched up by your ears. Maintain a slight bend in your elbows. This balanced position helps distribute weight evenly and prevents undue stress on your upper body and lower back during the setup procedure.
Optimizing Handlebar and Pedal Strap Settings
Once the seat is dialed in, turn your attention to the handlebars and pedal straps to complete the ergonomic fine-tuning of your stationary bike.
Handlebar Height and Reach
The ideal handlebar height depends on your comfort and riding style. For a more upright, casual ride, handlebars can be level with or slightly higher than the seat. For a more aggressive, performance-oriented stance (common on spin bikes), they might be slightly lower than the seat. The goal is to avoid overextending your arms or hunching your back. When gripping the handlebars, there should be a slight bend in your elbows, and your torso should be leaning forward comfortably. Adjust the handlebar post height and any horizontal adjustments until you find a position that feels natural and allows for a relaxed upper body.
Securing Your Feet: Pedal Straps
Most exercise bikes come with cage-style pedals and adjustable straps. Ensure your feet are centered on the pedals, with the ball of your foot directly over the pedal spindle (the axle the pedal rotates around). Tighten the straps so your feet are secure and won’t slip out during high-intensity intervals, but not so tight that they cut off circulation or cause discomfort. A snug fit is crucial for efficient power transfer and safety.
Understanding Console Functions and Basic Operation
With the physical setup complete, it’s time to get acquainted with the technological heart of your bike – the console. Getting your bike ready means understanding its features.
Powering Up and Basic Navigation
Most consoles power on when you start pedaling or by pressing a dedicated power button. Familiarize yourself with the main display, which typically shows time, distance, speed/RPM, calories burned, and resistance level. Navigate through modes and functions using the buttons provided (e.g., ‘Mode,’ ‘Enter,’ ‘Up/Down’ arrows). Refer to your manual for a detailed explanation of each button and display option.
Setting User Profiles
Many modern exercise bikes allow for multiple user profiles. Setting up your profile often involves inputting your age, weight, and gender. This data helps the console provide more accurate calorie burn estimates and tailor certain workout programs to your fitness level. Take the time to create and select your profile before each workout.
Resistance and Program Selection
Understand how to adjust the resistance – usually via a knob, buttons, or integrated into programs. Start with a low resistance to warm up, then gradually increase it as your workout progresses. Explore the pre-programmed workouts if available. These can offer varied challenges like hill climbs, interval training, or fat-burning routines, taking the guesswork out of structuring your session.
Pre-Ride Checklist and Maintenance Tips
Before you embark on your first ride, and regularly thereafter, a quick check and some maintenance can prevent issues and prolong the life of your equipment.
The Final Safety Check
Before every ride, give your exercise bike a quick once-over. Are all adjustment knobs and levers tight? Is the seat securely in place? Are the handlebars stable? Are the pedals still firmly attached? Check for any loose parts or unusual noises. A few seconds of inspection can prevent accidents or discomfort during your workout. Ensure the bike is stable on the floor; adjust leveling feet if necessary.
Regular Maintenance for Longevity
Maintaining your exercise bike is simple but essential. Wipe down the bike after each use to remove sweat, which can corrode metal parts over time. Check bolts and screws periodically (monthly or bi-monthly, depending on usage) to ensure they haven’t loosened. Lubricate moving parts if recommended by the manufacturer, particularly on chain-driven bikes, though most modern bikes are belt-driven and require less lubrication. Keep the console free of dust and liquids.
Troubleshooting Common Issues
If you encounter issues like squeaks, wobbles, or console malfunctions, refer to your manual’s troubleshooting section. Squeaks often come from loose connections that need tightening. Wobbles can usually be resolved by adjusting the leveling feet on the stabilizers. For console issues, ensure batteries are fresh (if applicable) and connections are secure. Regular attention to these details will keep your bike performing optimally.
| Adjustment Area | Goal/Indicator | Common Impact of Incorrect Setup |
|---|---|---|
| Seat Height | Slight 25-30° knee bend at pedal’s lowest point | Knee pain, hip rocking, inefficient pedaling |
| Seat Fore/Aft | Kneecap plumb line aligns with ball of foot at 3/9 o’clock pedal position | Knee strain, gluteal discomfort, incorrect muscle engagement |
| Handlebar Height | Comfortable reach, slight elbow bend, neutral spine | Back pain, neck stiffness, shoulder discomfort |
| Pedal Straps | Foot centered, snug but not constricting | Foot slippage, numbness, inefficient power transfer |
Mastering the setup process for your exercise bike transforms it from a piece of equipment into a personalized fitness tool. By following these steps for initial assembly, making precise ergonomic adjustments, and understanding the console’s functions, you’re investing in a safer, more comfortable, and ultimately more effective workout experience. Take the time to optimize your exercise bike, and enjoy the ride!
Frequently Asked Questions
How do I adjust the seat height on my exercise bike?
Loosen the adjustment knob or lever located beneath the seat post. Raise or lower the seat until your leg has a slight bend (about 25-30 degrees) at the bottom of the pedal stroke when your heel is on the pedal. Ensure the seat is securely tightened before riding your exercise bike to prevent movement.
What’s the best way to set the handlebars for an exercise bike?
Adjust the handlebars to a comfortable height that allows you to maintain a slight forward lean without straining your back or shoulders. Often, this is roughly level with or slightly higher than the seat, but personal preference for comfort is key. Make sure the handlebars are firmly secured after adjustment to ensure stability.
How do I ensure my exercise bike is stable and level?
Most exercise bikes have adjustable leveling feet located on the front and rear stabilizer bars. Turn these feet clockwise or counter-clockwise until the bike sits firmly on the floor without any wobbling. This prevents unwanted movement during your workout and ensures a safe, stable ride.
How do I properly attach the pedals to my new exercise bike?
Carefully identify the L (left) and R (right) markings on both the pedals and the crank arms. The right pedal threads clockwise, while the left pedal threads counter-clockwise. Hand-tighten them first, then use a wrench to fully secure them very tightly to prevent stripping or loosening during use.
When you purchase a product through Amazon links on EllipticalKing.com, we may earn a small commission at no extra cost to you. This helps support the site and keep our content free. As an Amazon Associate, We earn from qualifying purchases