
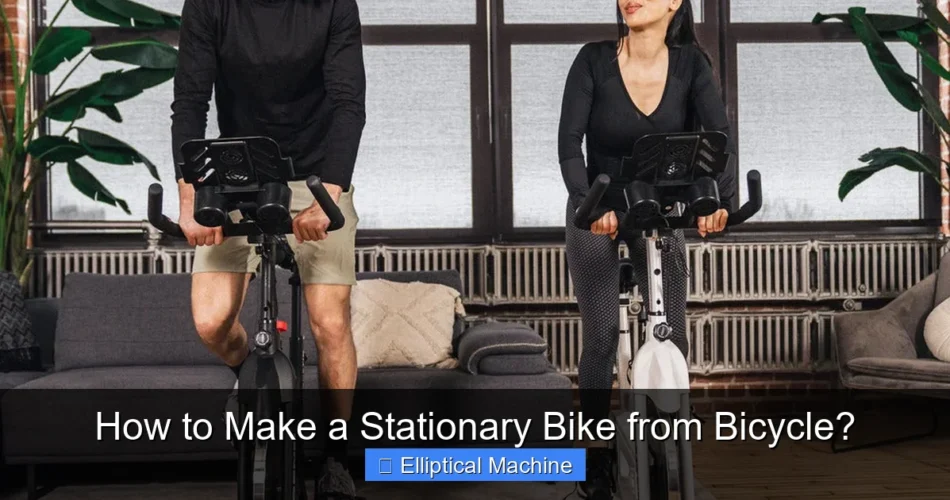
Converting a standard bicycle into a stationary exercise machine is a practical and cost-effective solution for at-home fitness. How to Make a Stationary Bike from Bicycle? This method leverages existing equipment to create a dedicated indoor training setup, offering a convenient way to stay active regardless of weather or time constraints. This approach transforms your outdoor ride into a versatile fitness tool, providing numerous benefits for your health and wallet.
Quick Answers to Common Questions
How stable will my DIY stationary bike be?
Stability is key! Ensure you use a sturdy stand or frame that firmly grips your bicycle’s rear wheel axle or chainstays to safely make a stationary bike from bicycle.
Do I need a lot of special tools for this conversion?
Not really! For most methods to make a stationary bike from bicycle, you’ll primarily need basic hand tools like wrenches or Allen keys, plus your chosen bike trainer stand or DIY frame materials.
Is making a stationary bike from my bicycle really cheaper than buying one?
Absolutely! Converting your existing bike is often significantly more budget-friendly than purchasing a dedicated stationary bike, especially if you already own a basic bike trainer or can source materials affordably.
📑 Table of Contents
- Why Convert Your Bicycle? Benefits of a DIY Stationary Setup
- Essential Tools and Materials for Your DIY Stationary Bike Setup
- Building Your Stationary Bike from Bicycle: A Step-by-Step Guide
- Customization and Enhancements for Your DIY Exercise Bike
- Safety Considerations and Maintenance Tips for Your New Setup
- Choosing the Right Bicycle for Conversion
- DIY vs. Commercial Stationary Bike Comparison
Why Convert Your Bicycle? Benefits of a DIY Stationary Setup
The decision to transform your outdoor bicycle into an indoor stationary trainer often stems from a desire for convenience, cost savings, and year-round fitness accessibility. Rather than investing in a new, often expensive, dedicated stationary bike or an elliptical machine, repurposing your existing bike offers a sustainable and budget-friendly alternative. This DIY project provides a stable platform for cardiovascular workouts, endurance training, and even high-intensity interval training (HIIT) from the comfort of your home.
- Cost-Effectiveness: Building a stationary bike from bicycle components typically costs significantly less than purchasing a new indoor bike or an elliptical machine. You’re utilizing equipment you already own, only needing to acquire a stand and, potentially, a resistance unit.
- Convenience and Accessibility: No more cancelled rides due to bad weather, dark evenings, or busy streets. Your DIY setup ensures that a workout is always available, anytime, right in your living space.
- Familiarity and Comfort: You’re already accustomed to your bike’s saddle, handlebars, and geometry. This familiarity can lead to more comfortable and effective workouts, as you don’t need to adapt to a new machine.
- Sustainability: Repurposing and reusing your bicycle reduces waste and extends the life of your equipment, aligning with eco-conscious practices.
- Versatility: Most DIY setups allow for easy conversion back to an outdoor bike, offering the best of both worlds.
Essential Tools and Materials for Your DIY Stationary Bike Setup
Before you embark on this exciting project, gathering the necessary tools and materials is crucial. The core of any successful stationary bike conversion revolves around a sturdy stand and an effective resistance mechanism.
The Stationary Stand
The stand is the foundation of your indoor setup. There are primarily two types suitable for this project:
- Wheel-on Trainer: This is the most common and simplest option. Your bike’s rear wheel rests on a roller, which is connected to a resistance unit. These are generally affordable and easy to set up. Look for models compatible with your bike’s wheel size and axle type.
- Direct-Drive Trainer: More advanced, these trainers replace your bike’s rear wheel entirely. You remove the rear wheel, and the bike’s chain connects directly to the trainer’s cassette. Direct-drive trainers offer a more realistic ride feel, quieter operation, and often more accurate power measurement, but they come at a higher cost.
- DIY Frame Stands: For the truly adventurous, you can construct a wooden or metal frame to hold your bike upright. This often involves securing the bike’s axles into the frame, but requires more engineering skill and material.
Resistance Mechanisms
Resistance is what makes your workout challenging. Most commercial trainers incorporate one of these types:
- Magnetic Resistance: Magnets create resistance against a flywheel. These are generally quiet, reliable, and often allow for adjustable resistance levels.
- Fluid Resistance: A sealed unit containing fluid provides resistance as the flywheel spins. Fluid trainers are known for their smooth, road-like feel and progressive resistance (resistance increases as you pedal faster).
- Wind Resistance: A fan blades create resistance. While effective, these can be quite noisy.
Safety Gear and Accessories
Beyond the stand and resistance, consider these items for safety and enhanced training:
- Front Wheel Riser Block: This levels your bike, preventing an unnatural downward slope and improving comfort.
- Trainer Skewer (Optional): Some trainers come with their own quick-release skewer, designed to fit securely into the trainer’s clamping mechanism.
- Trainer Tire (Recommended): Standard road tires wear out quickly and leave rubber residue on indoor trainers. A dedicated trainer tire is more durable and quieter.
- Floor Mat: Protects your floor from sweat and vibrations.
- Fan: Essential for keeping cool during intense workouts.
- Towel: For sweat management and protecting your bike’s components.
Building Your Stationary Bike from Bicycle: A Step-by-Step Guide
With your tools and materials ready, it’s time to assemble your indoor training setup. This process is generally straightforward, especially with a wheel-on trainer.
Setting Up the Frame
Start by unfolding your trainer stand and placing it on a stable, level surface. Ensure there’s enough space around it for you to get on and off your bike safely, and for any accessories like a fan or water bottle. If using a floor mat, place it underneath the trainer first.
Securing Your Bicycle
- Prepare Your Bike: If you’re using a wheel-on trainer, swap your regular rear tire for a trainer tire if you have one. This step is highly recommended to prolong the life of your regular tire and reduce noise. If your trainer came with a specific quick-release skewer, replace your bike’s existing skewer with it. For direct-drive trainers, remove your bike’s rear wheel completely.
-
Mount the Bike:
- For Wheel-on Trainers: Position your bike so the rear axle (or skewer) aligns with the clamping mechanism on the trainer. Carefully lower the bike and secure the skewer firmly into the trainer’s clamps. Ensure the bike is centered and stable. The trainer’s roller should be aligned with the center of your rear tire.
- For Direct-Drive Trainers: Mount your bike’s frame directly onto the trainer’s axle, aligning the chain with the trainer’s cassette. Secure the quick-release or thru-axle as you would your regular rear wheel.
- Adjust Tire Pressure and Resistance (Wheel-on): For wheel-on trainers, inflate your rear tire to the manufacturer’s recommended pressure (usually 90-110 psi for a road bike) to optimize contact with the roller. Engage the resistance unit so the roller presses firmly against the tire. There should be enough pressure to prevent slippage but not so much that it excessively deforms the tire. A good rule of thumb is to tighten until the roller just touches the tire, then give it another 1-2 full turns.
- Add Front Wheel Riser: Place the front wheel riser block directly under your front wheel. This stabilizes the bike and raises the front end to match the height of the rear wheel, ensuring a natural riding position.
Initial Check and Test Ride
Before your first full workout, gently spin the pedals to ensure everything is moving freely and quietly. Check for any wobbling or unusual noises. Then, carefully get on your bike and pedal slowly to confirm stability and proper resistance engagement. Make any necessary adjustments to the clamping force or resistance unit until you feel secure and the resistance feels consistent.
Customization and Enhancements for Your DIY Exercise Bike
Once you’ve mastered the basic setup, there are many ways to enhance your indoor cycling experience. This practice can turn a simple trainer into a sophisticated training hub.
Adjusting Resistance Levels
Many wheel-on trainers come with a remote lever that attaches to your handlebars, allowing you to adjust resistance on the fly. If yours doesn’t, you can often vary resistance by changing gears on your bike, just as you would outdoors. Direct-drive smart trainers automatically adjust resistance based on virtual routes or structured workouts.
Comfort and Ergonomics
- Saddle Choice: Ensure your saddle is comfortable for longer indoor sessions. Consider a gel cover or a different saddle if needed.
- Handlebar Position: Adjust your handlebar height and reach for optimal comfort. Prolonged stationary riding can sometimes highlight discomforts not apparent on outdoor rides.
- Fan Placement: Position a powerful fan to simulate outdoor airflow. This is crucial for cooling and preventing overheating.
- Towel Bar: A small towel draped over your handlebars can protect them from sweat and provide easy access for wiping your face.
Integrating Technology
Modern indoor cycling has been revolutionized by technology. You can significantly upgrade your DIY setup:
- Bike Computer/GPS: Your existing bike computer can track speed, distance, and time.
- Cadence and Speed Sensors: Affordable sensors can attach to your crank arm (cadence) and wheel hub (speed) to provide more accurate data.
- Heart Rate Monitor: An essential tool for training within specific zones.
- Power Meter: For serious training, a power meter (either crank, pedal, or hub-based) offers the most accurate and consistent metric for training intensity.
- Virtual Training Platforms: If you have a smart trainer or use ANT+/Bluetooth sensors, platforms like Zwift, TrainerRoad, or Rouvy can immerse you in virtual worlds, guided workouts, and competitive races. A tablet or TV screen positioned in front of your bike is ideal for this.
Safety Considerations and Maintenance Tips for Your New Setup
Ensuring the safety and longevity of your DIY stationary bike setup is paramount. Regular checks and proper maintenance will keep your training environment safe and effective.
Pre-Ride Checks
Before every session, take a moment to perform these quick checks:
- Trainer Stability: Ensure the trainer is stable on the ground and not wobbly.
- Bike Secureness: Double-check that your bike’s skewer or axle is firmly clamped into the trainer. There should be no play or movement.
- Tire Pressure (Wheel-on): Verify your trainer tire is inflated to the correct pressure.
- Resistance Unit Engagement (Wheel-on): Make sure the roller is pressed firmly against the tire to prevent slippage.
- Front Wheel Riser: Confirm the riser is correctly positioned and the front wheel is stable.
Ongoing Maintenance
Just like an outdoor bike, your indoor setup benefits from routine care:
- Cleanliness: Sweat is corrosive. Wipe down your bike and trainer after each use, especially areas exposed to sweat like handlebars, top tube, and components.
- Lubricate Chain: The chain still moves and wears indoors. Keep it clean and well-lubricated.
- Trainer Tire Inspection: If using a trainer tire, periodically check for wear and tear. Replace it if it shows signs of excessive wear.
- Trainer Bolts/Hardware: Occasionally check and tighten any bolts or fasteners on the trainer itself to ensure structural integrity.
- Fluid/Magnetic Unit (if applicable): Most sealed units require no maintenance, but refer to your trainer’s manual for specific instructions.
Common Pitfalls to Avoid
- Overheating: Use a fan! Even indoors, intense cycling generates a lot of body heat, leading to discomfort and reduced performance.
- Uneven Floor: A wobbly setup is unsafe. Use shims under the trainer’s legs if your floor isn’t perfectly level.
- Tire Slip: If your wheel-on trainer’s tire is slipping, increase the roller’s pressure against the tire, or ensure your tire pressure is adequate.
- Neglecting Bike Maintenance: Indoor riding still causes wear. Don’t forget to clean and lubricate your drivetrain.
Choosing the Right Bicycle for Conversion
While most bicycles can be adapted for indoor use, some are better suited for the conversion process than others. Understanding which types of bikes integrate best with trainers can save you time and potential compatibility headaches.
Road Bikes and Mountain Bikes
Road bikes are arguably the easiest and most popular choice for conversion. Their standard quick-release skewers and axle widths (typically 130mm for road, 135mm for older mountain bikes) are compatible with a vast majority of wheel-on trainers. For mountain bikes, especially newer models with thru-axles or boost spacing, you might need specific adapters for your trainer, which are usually available from the trainer manufacturer. If you plan to use your mountain bike, consider swapping knobby tires for slick tires to reduce noise and vibration on wheel-on trainers.
Hybrid and Commuter Bikes
Many hybrid and commuter bikes also work well. Check their rear axle type and spacing. If they have a standard quick-release rear wheel, they’ll likely fit most trainers. Be aware that some urban bikes might have internal gear hubs or less common axle designs that may not be directly compatible with all trainers. Always check the trainer’s specifications for axle compatibility.
Electric Bikes (E-bikes)
While technically convertible, e-bikes present unique considerations. Their heavier weight might exceed the weight limits of some trainers. Also, if they have a motor in the rear hub, a wheel-on trainer will not work, and a direct-drive trainer might not be compatible if the motor interferes with mounting. Always consult both your e-bike and trainer manufacturer’s guidelines before attempting to use an e-bike on a trainer.
Fixed Gear and Single Speed Bikes
Fixed gear and single-speed bikes can be used, but without gear changes, resistance adjustments rely solely on the trainer’s mechanism or your pedaling cadence. This can sometimes limit workout versatility compared to a multi-geared bike.
The key takeaway is to always verify the trainer’s compatibility with your bike’s rear axle type (quick release, thru-axle) and spacing before purchasing. Most trainers will list supported configurations clearly in their product specifications.
DIY vs. Commercial Stationary Bike Comparison
When considering an indoor cycling setup, weighing the pros and cons of building your own versus buying a dedicated unit is important. This table provides a quick overview.
| Feature | DIY Stationary Bike (using a trainer) | Commercial Stationary Bike (e.g., spin bike, exercise bike) |
|---|---|---|
| Initial Cost | Low to Medium (cost of trainer + accessories) | Medium to High |
| Space Required | Similar to bike footprint, can be folded (some trainers) | Dedicated footprint, often not foldable |
| Ride Feel | Very similar to your outdoor bike | Variable; can differ significantly from outdoor cycling |
| Maintenance | Requires maintenance of both bike & trainer | Specific to the unit; usually lower bike maintenance |
| Versatility | Bike can be easily removed for outdoor riding | Dedicated indoor use only |
| Technology Integration | Excellent with smart trainers/sensors | Often built-in, but can be proprietary |
| Noise Level | Varies by trainer type (fluid/magnetic quieter) | Generally quiet |
Transforming your beloved bicycle into an indoor training machine is a rewarding and practical project that opens up a world of year-round fitness possibilities. By following the steps outlined, from selecting the right trainer to fine-tuning your setup and maintaining it, you can create an effective and enjoyable exercise station at a fraction of the cost of a dedicated indoor bike. Embrace this versatile approach to fitness, and let your bicycle continue to carry you towards your health goals, rain or shine.
Frequently Asked Questions
What essential equipment do I need to make a stationary bike from my regular bicycle?
You’ll primarily need a bike trainer stand, which is a device designed to hold your bicycle’s rear wheel securely in place while allowing it to spin freely. Some basic tools like an adjustable wrench or hex keys might also be required for initial setup, depending on the specific trainer model and your bike’s quick-release skewer.
How challenging is it to convert a bicycle into a stationary bike, and how long does it typically take?
The process of turning a regular bicycle into a stationary bike is generally quite straightforward and can often be done in under 15-30 minutes. Most modern bike trainers are designed for quick and easy attachment, requiring minimal mechanical expertise to get your bicycle ready for an indoor workout.
How stable and safe is a homemade stationary bike created from a standard bicycle?
When properly set up with a reputable bicycle trainer stand, your homemade stationary bike will be very stable and safe for indoor cycling. Ensure your bike is securely clamped into the trainer’s quick-release mechanism and that the trainer itself is placed on a level, solid surface to prevent any wobbling during use.
Can I adjust the resistance on my stationary bike created from a bicycle, and what are its main benefits?
Yes, most modern bike trainers offer adjustable resistance levels, allowing you to vary your workout intensity just like a dedicated stationary bike. The main benefits include cost savings compared to a standalone stationary bike, convenience for year-round indoor cycling regardless of weather, and making effective use of equipment you already own.
When you purchase a product through Amazon links on EllipticalKing.com, we may earn a small commission at no extra cost to you. This helps support the site and keep our content free. As an Amazon Associate, We earn from qualifying purchases