
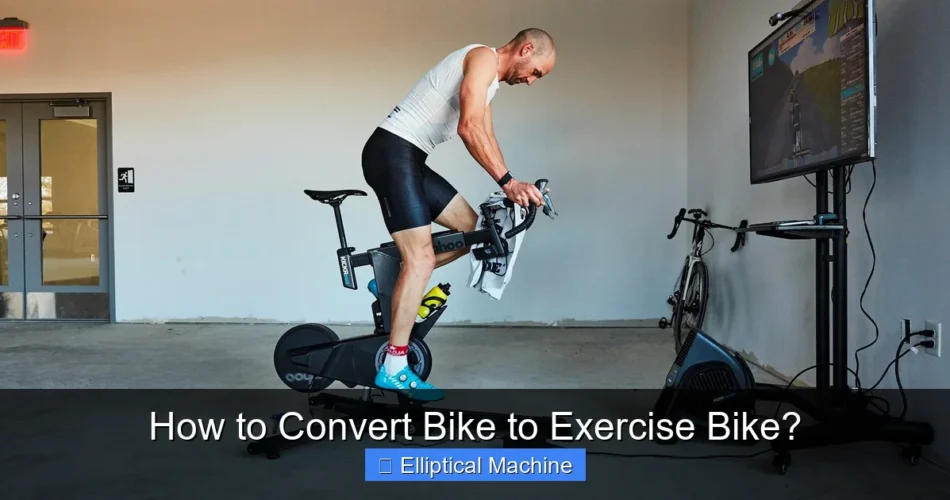
How to Convert Bike to Exercise Bike? You can effectively transform your outdoor bicycle into a stationary exercise bike by utilizing a bike trainer stand. This method allows you to continue your cycling routine indoors, providing a convenient and cost-effective solution for year-round fitness. It leverages your existing bike, making it accessible for home workouts regardless of weather conditions.
This approach offers significant flexibility, enabling cyclists of all levels to maintain their training regimen without investing in a dedicated stationary bike. It’s an excellent way to maximize the utility of your current gear, turning a seasonal outdoor activity into a consistent indoor fitness practice.
Quick Answers to Common Questions
What’s the absolute must-have to convert bike to exercise bike?
To convert bike to exercise bike, your key piece of gear is an indoor bike trainer – either a wheel-on or a direct-drive model. Don’t forget a front wheel riser block for extra stability and a level ride!
How difficult is it to set up this DIY exercise bike?
Not at all! Most indoor trainers are surprisingly simple to set up, often taking just a few minutes. You’ll be ready to pedal your new exercise bike in no time!
Will converting my bike into an exercise bike cause wear or damage?
Rest assured, converting your bike into an exercise bike with a trainer is generally very safe for your bike frame and components. Just ensure your bike is securely mounted and clean to prevent any issues.
📑 Table of Contents
- Choosing the Right Equipment: Bike Trainers and Accessories
- Preparing Your Bicycle for Indoor Use
- Setting Up Your Bike Trainer: A Step-by-Step Guide
- Optimizing Your Indoor Cycling Experience
- Benefits and Considerations of Converting Your Bike to an Exercise Bike
- Maintenance and Troubleshooting for Your Indoor Setup
Choosing the Right Equipment: Bike Trainers and Accessories
The foundation of converting your bicycle into an indoor exercise machine is the bike trainer. Selecting the correct type is crucial for a stable, enjoyable, and effective workout experience. Trainers essentially elevate the rear wheel of your bike, allowing it to spin freely against a resistance unit.
Types of Bike Trainers
- Wheel-on Trainers: These are the most common and often the most affordable option. Your bike’s rear wheel simply rests against a roller connected to a resistance unit. They are easy to set up and compatible with most road and mountain bikes, though some mountain bikes might require a slick tire swap.
- Direct-Drive Trainers: These trainers replace your bike’s rear wheel entirely. You remove your bike’s rear wheel and mount the frame directly onto the trainer’s cassette. This offers a more realistic road feel, quieter operation, and usually more accurate power measurement. They are generally more expensive but provide a premium indoor cycling experience.
- Rollers: Unlike trainers that fix your bike in place, rollers allow your bike to move freely on a set of three cylindrical rollers. This requires more balance and core engagement, mimicking actual riding more closely. They are excellent for developing bike handling skills but can have a steeper learning curve.
Essential Accessories for Your Setup
- Riser Block: This elevates your front wheel to match the height of your rear wheel, ensuring your bike is level. It prevents uncomfortable angles and puts you in a natural riding position.
- Trainer Tire (for wheel-on trainers): A dedicated trainer tire is highly recommended for wheel-on trainers. These tires are designed to withstand the heat and friction generated on the roller, reducing wear on your regular road tires and minimizing noise.
- Floor Mat: A mat placed under your bike and trainer protects your floor from sweat and potential damage, while also helping to dampen vibrations and noise.
- Fan: Indoor cycling generates a lot of body heat. A good fan is indispensable for keeping cool and comfortable during your workout sessions.
- Heart Rate Monitor/Cadence Sensor: For more structured training, these devices can track your performance metrics, helping you monitor progress and optimize your workouts.
Preparing Your Bicycle for Indoor Use
Before you mount your bike on a trainer, a few preparatory steps will ensure its longevity and your comfort during indoor sessions. Proper preparation also contributes to a smoother and quieter ride.
Cleaning and Inspection
Give your bike a thorough clean, especially the drivetrain. Removing dirt, grime, and road grit will prevent them from accumulating on the trainer’s resistance unit and reduce noise. Inspect your tires for any embedded debris, especially if using a wheel-on trainer, as this can transfer to the roller. Check the tire pressure and inflate it to the recommended PSI for a consistent ride.
Adjusting Your Bike’s Components
- Gearing: Ensure your gears are clean and shifting smoothly. While you might not shift as frequently as outdoors, having access to various resistances is crucial for a varied workout.
- Seat Height and Handlebar Position: Double-check your bike fit. Your indoor setup should mimic your outdoor riding position as closely as possible to prevent discomfort or injury. Consider marking your outdoor positions if you plan to frequently switch your bike between indoor and outdoor use.
Special Considerations for Wheel-on Trainers
If you’re using a wheel-on trainer, consider swapping your rear wheel’s outdoor tire for a dedicated trainer tire. These tires are typically made from a harder compound, designed to withstand the heat and friction of the trainer’s roller. This protects your expensive outdoor tires from premature wear and significantly reduces noise levels.
Setting Up Your Bike Trainer: A Step-by-Step Guide
The actual installation of your bike onto the trainer is a straightforward process, but following the correct steps will ensure stability and safety. This conversion process is typically quick and can be done in minutes once familiarized.
Mounting Your Bicycle Securely
- Position the Trainer: Place your trainer on a stable, level surface. If you have a floor mat, lay it down first.
- Install the Riser Block: Place the front wheel of your bike onto the riser block to level the bike.
- Attach the Rear Wheel (for Wheel-on Trainers):
- Open the skewer clamp on the trainer.
- Carefully lower the rear axle of your bike onto the trainer’s skewer cups.
- Close the trainer’s skewer clamp securely, ensuring the bike is firmly held in place. Give it a gentle wiggle to confirm stability.
- Adjust the resistance unit so that the roller makes firm contact with your tire. You should feel slight pressure when spinning the wheel by hand.
- Install Direct-Drive Trainers:
- Remove your bike’s rear wheel.
- Carefully lift your bike and align the rear dropouts with the axle on the direct-drive trainer.
- Lower the bike onto the trainer, ensuring the chain engages with the trainer’s cassette.
- Secure the bike using your bike’s quick release skewer or thru-axle, as per the trainer’s instructions.
Testing and Adjustments
Once your bike is mounted, spin the pedals a few times to ensure everything is running smoothly. Check for any rubbing noises or instability. Adjust the resistance unit tension if necessary for wheel-on trainers – too loose and the tire will slip, too tight and it will cause excessive wear. For smart trainers, connect them to your preferred cycling app and perform any required calibration according to the manufacturer’s instructions. This conversion technique makes it simple to integrate into digital training platforms.
Optimizing Your Indoor Cycling Experience
Beyond the basic setup, several elements can significantly enhance your indoor riding comfort and engagement, making your stationary bike sessions more enjoyable and effective.
Comfort and Ergonomics
- Ventilation: As mentioned, a fan is crucial. Position it strategically to cool your body effectively.
- Hydration: Keep water bottles within easy reach. Indoor cycling can lead to significant fluid loss.
- Entertainment: Combat boredom with music, podcasts, movies, or virtual cycling apps like Zwift or TrainerRoad. These platforms can simulate outdoor routes and structured workouts, adding a gamified element to your training.
- Towel: Keep a towel handy to wipe away sweat, which can drip onto your bike or floor.
Creating an Engaging Environment
Consider dedicating a specific space in your home for your indoor cycling setup. This creates a psychological cue for exercise and ensures all your gear is readily available. A smart TV or monitor to display your virtual cycling app can further immerse you in the experience, transforming your living room into a dynamic training ground. This approach to converting your bike maximizes both convenience and motivation.
Benefits and Considerations of Converting Your Bike to an Exercise Bike
Embracing this indoor cycling solution offers a multitude of advantages, alongside a few points to consider before committing to the setup.
Advantages of This Conversion Method
- Cost-Effective: You utilize your existing bike, saving the expense of a separate stationary bike.
- Familiarity: You’re riding your own bike, which means familiar fit, feel, and components, leading to a more natural and comfortable workout.
- Year-Round Training: Weather is no longer a barrier. You can maintain your fitness regardless of rain, snow, heat, or darkness.
- Convenience: No need to travel to a gym. Your workout is available on demand in your home.
- Data Tracking: Many smart trainers integrate with cycling apps, allowing you to track performance metrics like power, speed, and cadence for structured training.
- Space Efficiency: While the trainer takes up some space, it’s often less bulky than a dedicated exercise bike, and many trainers fold for storage.
Points to Consider
- Noise: Wheel-on trainers can be noisy, especially with certain tire types. Direct-drive trainers are much quieter.
- Wear and Tear: Indoor use, particularly on wheel-on trainers, can accelerate tire wear. A trainer tire mitigates this.
- Realism: While direct-drive trainers offer a good road feel, no indoor setup can perfectly replicate the dynamics of outdoor riding, including cornering or descents.
- Setup Time: If you frequently switch your bike between indoor and outdoor use, the minor setup/teardown time can add up.
- Stability: While trainers are generally stable, they don’t offer the same complete “rooted” feel as some heavy, dedicated stationary bikes.
Maintenance and Troubleshooting for Your Indoor Setup
To ensure your converted exercise bike provides consistent performance and lasts for years, a little maintenance and knowing how to troubleshoot common issues are beneficial.
Regular Maintenance Tips
- Clean Your Drivetrain: Regular cleaning and lubrication of your chain, cassette, and chainrings are even more important indoors, as sweat can be corrosive.
- Inspect Trainer Roller (Wheel-on): Check the roller for any buildup or wear. Keep it clean for optimal tire grip and resistance.
- Check Skewer/Axle: Ensure the quick release or thru-axle securing your bike to the trainer remains tight and secure.
- Trainer Calibration: If using a smart trainer, perform regular calibration (as per manufacturer instructions) for accurate power readings.
- Fan and Mat Care: Clean your fan blades periodically and wipe down your floor mat to remove sweat and dust.
Common Troubleshooting Scenarios
- Slipping Tire (Wheel-on): Increase the tension of the resistance unit against the tire. Ensure your tire is inflated to the correct pressure. A trainer tire can also significantly reduce slippage.
- Excessive Noise: Check if the trainer is on a level surface. Ensure your bike’s drivetrain is clean and lubricated. Trainer tires dramatically reduce noise from wheel-on trainers. For direct-drive, check for any loose components.
- Inaccurate Power Readings: Ensure your smart trainer is calibrated regularly. Check for firmware updates. Environmental factors like temperature can sometimes affect accuracy, so calibrate when the trainer is at room temperature.
- Bike Wobble: Double-check that your bike is securely clamped into the trainer’s skewer cups or axle. Ensure the floor beneath the trainer is level.
By following these steps and considering the recommended accessories, you can successfully convert your bike to an exercise bike, creating an efficient and enjoyable home workout station. This simple yet effective modification allows you to continue your cycling passion regardless of the weather, providing a seamless transition from outdoor adventures to indoor training.
Frequently Asked Questions
What essential equipment do I need to convert my bike into a stationary exercise bike?
To convert your bike, you primarily need a bike trainer stand. These come in various types, such as wheel-on trainers (magnetic or fluid) which your bike’s rear wheel attaches to, or direct-drive trainers that replace your rear wheel. An exercise mat is also recommended to protect your floor and absorb sweat.
Is it difficult to convert a regular bike to an exercise bike, or can anyone do it?
Converting your bike is generally straightforward and can be done by most people without special tools. The process usually involves mounting your bike’s rear wheel onto a trainer stand, or for direct-drive trainers, removing the rear wheel and attaching the bike to the trainer. Most trainers come with clear instructions to guide you through setup.
Will converting my bicycle to an exercise bike cause damage or excessive wear to my bike components?
When done correctly with a quality trainer, converting your bike should not cause significant damage to the frame. However, your rear tire (on wheel-on trainers) and drivetrain will experience wear similar to regular riding. Using a specific trainer tire can help reduce wear on your standard road tire.
What are the main benefits of converting my bike to an exercise bike compared to buying a dedicated stationary bike?
Converting your existing bike is often a more cost-effective solution than purchasing a new exercise bike. It also allows you to use your familiar bike geometry and components, making the indoor riding experience more comfortable and realistic. You can maintain your outdoor riding fitness indoors without needing extra storage for another full bike.
How do I adjust the resistance when I convert my bike to an exercise bike using a trainer?
Resistance adjustment varies by trainer type. For magnetic or fluid trainers, you typically adjust resistance via a lever attached to your handlebars or by simply shifting your bike’s gears. Smart trainers often connect to apps that automatically control resistance based on virtual terrain or structured workouts, providing a highly interactive experience.
When you purchase a product through Amazon links on EllipticalKing.com, we may earn a small commission at no extra cost to you. This helps support the site and keep our content free. As an Amazon Associate, We earn from qualifying purchases