
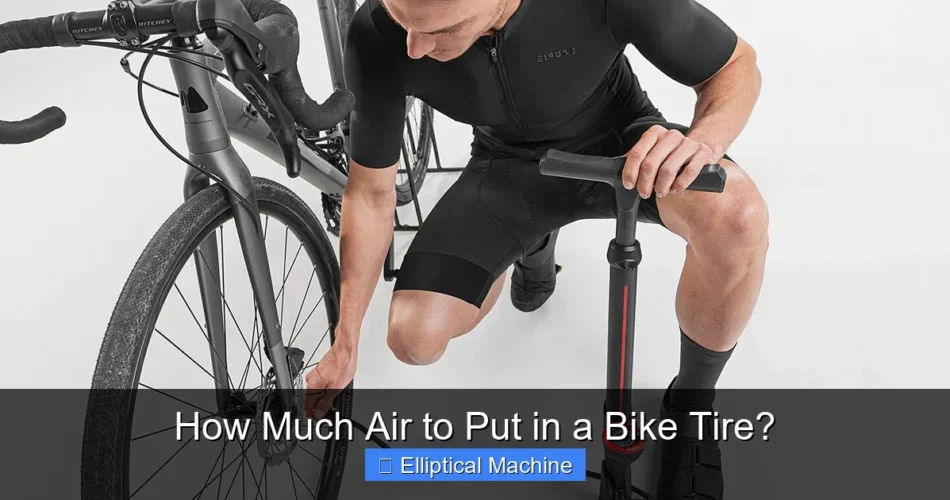
How Much Air to Put in a Bike Tire? Generally, the recommended pressure is printed on the tire sidewall, offering a crucial guide for optimal performance and safety. Adhering to this specification ensures better handling, prevents flats, and enhances your overall riding experience. Mastering this technique is fundamental for any cyclist, regardless of skill level or bike type.
Achieving the correct inflation pressure is a delicate balance, impacting everything from comfort and speed to puncture resistance. This practice, while seemingly simple, involves understanding several key factors that influence the ideal PSI for your specific setup and riding conditions.
Quick Answers to Common Questions
Where do I find the right PSI for my bike tires?
Look on the sidewall of your tire for the manufacturer’s recommended PSI (Pounds per Square Inch) range; this is your best guide for figuring out exactly **how much air to put in a bike tire**. It’ll often show a minimum and maximum.
How can I tell if my tire has enough air without a gauge?
While a gauge is always best, you can do a quick squeeze test: the tire should feel very firm and not easily deform when you press down on it. If it feels squishy, you definitely need more air to reach the ideal **how much air to put in a bike tire** for your ride.
Does the type of bike (road vs. mountain) affect tire pressure?
Absolutely! Road bikes typically use much higher pressure (80-120 PSI) for speed, while mountain bikes need lower pressure (20-40 PSI) for better grip and comfort on rough terrain. This difference is key to understanding **how much air to put in a bike tire** for your specific cycling style.
📑 Table of Contents
Understanding Tire Pressure (PSI) and Sidewall Markings
The first and most critical step in proper tire inflation is to understand what PSI (Pounds per Square Inch) means and how to find your tire’s recommended range. PSI is the standard unit of measurement for tire pressure, indicating the force with which the air pushes outwards on the tire’s inner surface.
Locating the Recommended Pressure Range
Every bicycle tire, from a skinny road race tire to a voluminous mountain bike tire, comes with a manufacturer-recommended pressure range. This range is almost always printed directly on the tire’s sidewall. It might appear as “Min. 35 PSI – Max. 60 PSI” or “Inflate to 40-65 PSI.” It’s important to note this is a range, not a single magic number, allowing for personal preference and adaptation to conditions. Ignoring this crucial marking can lead to premature tire wear, poor performance, or even dangerous riding conditions.
Why the Range Matters
- Lower End: Provides more comfort, better grip, and shock absorption, ideal for rougher terrains or for lighter riders. However, going too low increases the risk of pinch flats (where the tube gets pinched between the rim and an obstacle).
- Higher End: Offers less rolling resistance, making the bike feel faster and more efficient, suitable for smooth roads and heavier riders. Too high, however, can lead to a harsh, uncomfortable ride and reduced traction.
Factors Influencing How Much Air to Put in a Bike Tire?
While the sidewall provides a great starting point, several other factors should influence your decision on the precise inflation within that recommended range. Considering these elements will help you fine-tune your tire pressure for the best possible ride.
Rider Weight and Gear
A heavier rider or someone carrying significant gear (like touring bags or a child seat) will require higher tire pressure to support the load and prevent pinch flats. Conversely, lighter riders can often get away with slightly lower pressures for enhanced comfort and grip without sacrificing performance.
Tire Width and Volume
Wider tires (e.g., mountain bike tires, gravel tires) have a larger air volume. This means they can be run at lower pressures compared to narrower tires (e.g., road bike tires) while still providing adequate support. The greater air volume acts as a natural shock absorber, allowing for a more forgiving ride at lower PSI.
- Narrow Road Tires (23-28mm): Typically higher PSI (80-120 PSI) due to smaller air volume.
- Wider Gravel Tires (35-50mm): Moderate PSI (30-60 PSI) offering a balance of speed and comfort.
- Mountain Bike Tires (2.0-3.0 inches): Lower PSI (20-35 PSI) for maximum grip and shock absorption on trails.
Riding Conditions and Terrain
The type of surface you’ll be riding on significantly impacts ideal tire pressure.
- Smooth Pavement: Higher pressure within the recommended range reduces rolling resistance for speed and efficiency.
- Rough Roads/Gravel: Slightly lower pressure improves comfort, increases traction, and reduces the likelihood of pinch flats.
- Off-Road/Trails: Significantly lower pressure (within the safe range) maximizes grip, allows the tire to conform to the terrain, and absorbs impacts.
- Wet Conditions: Slightly lower pressure can improve traction by increasing the tire’s contact patch with the road.
Bike Type
Different types of bikes are designed for different purposes, and their tire pressure requirements reflect this.
- Road Bikes: Generally demand the highest pressures for minimal rolling resistance and maximum speed on paved surfaces.
- Mountain Bikes: Require lower pressures for grip, shock absorption, and stability on uneven trails.
- Hybrid/Commuter Bikes: Tend to fall in the middle, balancing comfort and efficiency for mixed terrain.
- E-bikes: Often heavier, they may require pressures at the higher end of the recommended range to support the additional weight and reduce the chance of flats.
The Right Tools for the Job
Having the correct equipment is essential for accurately checking and adjusting your tire pressure. Guessing or relying on a thumb test is unreliable and can lead to problems.
Floor Pump with Gauge
This is the workhorse of any cyclist’s garage. A good floor pump features a built-in pressure gauge, allowing you to inflate tires quickly and accurately. Look for models compatible with both Presta and Schrader valves, which are the two main types found on bicycles.
Hand Pump (for Emergencies)
While not ideal for daily inflation due to their smaller volume and often less accurate gauges, a compact hand pump is indispensable for roadside repairs or topping up a slow leak during a ride.
Digital Pressure Gauge
For the ultimate accuracy, a standalone digital pressure gauge can be a valuable addition. These often provide more precise readings than the integrated gauges on many floor pumps, allowing you to dial in your pressure with confidence.
The Pumping Process: Step-by-Step
Inflating your tires is a straightforward process once you understand the steps. Proper technique ensures both safety and accuracy.
1. Check Current Pressure
Before adding air, use your pump’s gauge or a separate digital gauge to measure the current pressure in your tires. This gives you a baseline and helps you determine how much air you need to add.
2. Prepare the Valve
Schrader Valves: These are like car tire valves. Simply unscrew the valve cap.
Presta Valves: These are thinner and have a small, knurled nut at the top. Unscrew this nut counter-clockwise until it’s loose, then tap the top to “break the seal.” Remember to tighten it again after inflating.
3. Attach the Pump Head
Firmly press the pump head onto the valve stem. For most modern pumps, you’ll then flip a lever (often found on the pump head itself) to lock it in place. Ensure a tight seal to prevent air leakage during inflation.
4. Inflate to the Correct PSI
Begin pumping. Watch the pressure gauge as you inflate. Pump steadily until you reach your desired PSI, taking into account the factors discussed earlier (sidewall recommendation, rider weight, terrain, etc.).
5. Remove the Pump and Close the Valve
Once you’ve reached the target pressure, flip the pump head lever back to its unlocked position and quickly remove it from the valve.
- Schrader: Replace the valve cap.
- Presta: Retighten the knurled nut clockwise until it’s snug, then replace the valve cap.
6. Re-check (Optional but Recommended)
For critical applications or if you want absolute precision, you can detach the pump, re-attach your digital gauge (if using one), and verify the pressure. Slight pressure loss can occur during pump detachment.
General Tire Pressure Guidelines
While specific sidewall markings and personal preference are paramount, these general guidelines can offer a helpful starting point across different bike types. Remember, these are approximations and should always be cross-referenced with your tire’s specific recommendations.
| Bike Type | Tire Width (Approx.) | PSI Range (General) | Key Considerations |
|---|---|---|---|
| Road Bike | 23-28mm | 80-120 PSI | Higher pressure for speed on smooth roads. Adjust for rider weight. |
| Gravel Bike | 35-50mm | 30-60 PSI | Lower for comfort and grip on varied terrain. Rider weight, tire volume. |
| Mountain Bike | 2.0-3.0 inches | 20-35 PSI | Lower for traction, shock absorption on trails. Tubeless setups often lower. |
| Hybrid/Commuter | 32-45mm | 40-70 PSI | Balance of comfort and efficiency for mixed-surface commuting. |
| Fat Bike | 4.0-5.0 inches+ | 5-15 PSI | Very low for maximum floatation and grip on snow/sand. |
Consequences of Incorrect Tire Pressure
Getting your tire pressure wrong can have significant negative impacts on your riding experience, your safety, and the lifespan of your equipment. It’s not just about a comfortable ride; it’s about performance and puncture prevention.
Tires Too Low
- Increased Risk of Pinch Flats: The most common issue. The tube gets pinched between the rim and the ground over bumps or potholes.
- Poor Handling and Stability: The tire can feel “squishy” and unresponsive, making steering sluggish and corners less secure.
- Higher Rolling Resistance: A deflated tire flattens out more, increasing the contact patch and creating more friction with the road, making you work harder.
- Rim Damage: In severe cases, riding on severely underinflated tires can lead to impacts that damage your rims.
- Reduced Tire Lifespan: Excessive flexing of the tire sidewalls can lead to premature wear and cracking.
Tires Too High
- Harsh, Uncomfortable Ride: Overinflated tires transmit every bump and vibration directly to the rider, leading to fatigue and discomfort.
- Reduced Grip and Traction: A very firm tire has a smaller, less compliant contact patch, reducing grip on wet surfaces, corners, and loose terrain. This can be dangerous.
- Increased Risk of Blowouts: While less common with modern tires, overinflating beyond the maximum recommended PSI can lead to tire failure, especially if the tire is old or damaged.
- Faster Wear on Center Tread: The tire wears more quickly down the center, as this is the primary point of contact with the road.
Understanding and applying the right tire pressure is a game-changer for any cyclist. By paying attention to your tire’s sidewall recommendations, considering your weight, riding conditions, and bike type, and using the right tools, you can significantly enhance your safety, comfort, and efficiency. Make checking your tire pressure a regular part of your pre-ride routine, and you’ll enjoy every mile more.
Frequently Asked Questions
What’s the recommended PSI for my bike tires?
The ideal air pressure (PSI) for your bike tires is typically printed on the sidewall of the tire itself, indicating a safe range. This range can vary significantly based on your tire type (road, mountain, hybrid), rider weight, and the intended riding surface. Generally, narrower road bike tires require higher PSI than wider mountain bike tires.
How often should I check the air in my bike tires?
It’s best practice to check your bike tire pressure before every ride, or at least once a week. Tires naturally lose air over time, and even a small drop in pressure can affect ride quality, efficiency, and increase the risk of flats. Maintaining proper air pressure ensures a safer and more enjoyable ride.
What happens if I put too much air in my bike tire?
Overinflating your bike tire can lead to a harsher, less comfortable ride, as the tire loses some of its ability to absorb bumps and vibrations. It also increases the risk of a tire blowout or damage to the rim, especially when hitting obstacles. While very high pressure might slightly reduce rolling resistance, excessive air can compromise grip and overall safety.
What happens if there isn’t enough air in my bike tire?
Riding with too little air in your bike tire significantly increases the risk of pinch flats, where the inner tube gets pinched between the rim and the ground. Underinflation also makes pedaling harder due to increased rolling resistance and can negatively impact handling and stability. Furthermore, it can potentially damage your wheel rim if you hit a bump hard.
How do I accurately measure the air pressure in my bike tire?
To accurately measure the air pressure in your bike tire, you should always use a dedicated pressure gauge. While some pumps have integrated gauges, a standalone digital or analog gauge often provides more precise readings. Squeezing the tire with your hand is not a reliable method for determining correct inflation.
When you purchase a product through Amazon links on EllipticalKing.com, we may earn a small commission at no extra cost to you. This helps support the site and keep our content free. As an Amazon Associate, We earn from qualifying purchases