
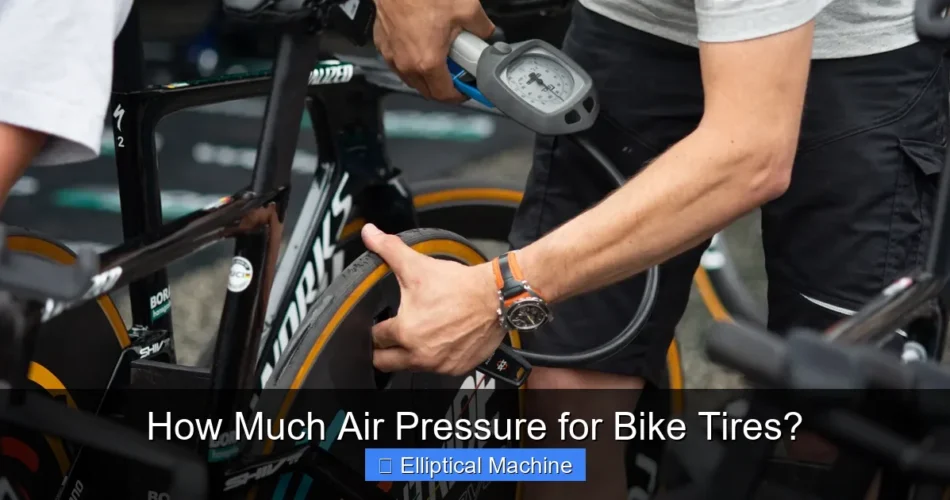
How Much Air Pressure for Bike Tires? The ideal air pressure for bike tires is not a fixed number, but rather a dynamic range determined by several factors including rider weight, tire size, terrain, and bike type. Achieving optimal tire pressure significantly enhances ride comfort, performance, safety, and tire longevity. Understanding this crucial aspect of bike maintenance is key to a better cycling experience.
This process of finding the right inflation level is more an art than a strict science, often requiring a bit of experimentation to dial in the perfect feel for your specific setup and riding preferences. Proper inflation can transform your ride, making it smoother and more efficient.
Quick Answers to Common Questions
Where can I find the correct air pressure for my bike tires?
You’ll usually find the recommended **air pressure for bike tires** printed right on the sidewall of your tire, often as a PSI (pounds per square inch) range. This is always your best starting point!
What happens if I have too much or too little air pressure in my tires?
Too much **air pressure for bike tires** can lead to a harsh ride and reduced grip, while too little makes pedaling harder and increases the risk of pinch flats. Aim for the manufacturer’s recommended range for the optimal balance of comfort and performance.
How often should I check my bike tire pressure?
It’s a great habit to quickly check your **air pressure for bike tires** before almost every ride, especially if it’s been a few days. Tires naturally lose a bit of air over time, so regular checks keep you rolling smoothly and safely.
📑 Table of Contents
- Understanding PSI: The Foundation of Tire Pressure
- Factors Influencing Your Ideal Tire Pressure
- Finding Your Ideal Air Pressure for Bike Tires
- How Much Air Pressure for Bike Tires?: Measuring and Adjusting
- Common Mistakes and Troubleshooting
- Optimal Tire Pressure Guidelines for Different Bike Types
- Conclusion
Understanding PSI: The Foundation of Tire Pressure
PSI, or Pounds per Square Inch, is the standard unit of measurement for tire pressure. It quantifies the force exerted by the air inside your tire against its inner walls. While seemingly simple, the correct PSI is foundational to how your bike performs on the road or trail.
Why PSI Matters for Your Ride
- Rolling Resistance: Tires that are too soft create more friction with the ground, increasing rolling resistance and making you work harder. Over-inflated tires can also increase resistance by reducing the tire’s ability to deform and absorb road imperfections.
- Grip and Traction: Proper pressure allows the tire to deform slightly, maximizing the contact patch with the ground for optimal grip. Too much pressure can reduce this contact, especially on uneven surfaces, leading to a loss of traction. Too little pressure causes excessive tire deformation, leading to a squishy, unstable feel and poor grip in corners.
- Comfort: The tire acts as a primary suspension component. Correctly inflated tires absorb bumps and vibrations, leading to a much smoother and more comfortable ride.
- Puncture Protection: Under-inflated tires are highly susceptible to “pinch flats,” where the tube gets pinched between the rim and an obstacle. Over-inflated tires can be more prone to cuts from sharp objects, and they offer a harsher ride that transmits more impact to the rim.
- Tire Longevity: Running tires at the correct pressure minimizes uneven wear patterns, extending their useful life. Both under and over-inflation can lead to premature tire degradation.
Factors Influencing Your Ideal Tire Pressure
There’s no single “magic number” for tire pressure. Your optimal PSI will depend on a combination of personal and environmental factors.
Rider Weight and Gear Load
The heavier the rider and their gear, the more air pressure is generally needed to support the load and prevent excessive tire deformation. A lighter rider will typically run lower pressures for comfort and grip.
Tire Size and Volume
- Road Bikes (Narrow Tires): Traditional road tires (23-28mm) require higher pressures due to their small air volume.
- Gravel and Hybrid Bikes (Medium Width Tires): Tires ranging from 30-45mm have more air volume and can be run at lower pressures, offering a balance of speed and comfort.
- Mountain Bikes (Wide Tires): Mountain bike tires (often 2.0 inches or wider) have the largest air volume and are typically run at the lowest pressures, prioritizing grip and shock absorption on rugged terrain.
- Fat Bikes: These have extremely wide tires and very low pressures, sometimes in single digits.
Wider tires inherently have a larger air volume, meaning they can support a given load with less pressure compared to narrower tires. This is why a mountain bike tire might be at 25 PSI while a road bike tire is at 90 PSI.
Terrain and Riding Conditions
- Smooth Roads: Higher pressures are often preferred for efficiency and speed on paved surfaces, as they reduce rolling resistance.
- Rough Roads/Gravel: Slightly lower pressures improve comfort, increase grip, and reduce the risk of pinch flats on uneven surfaces.
- Off-Road/Trails: Significantly lower pressures are crucial for maximum traction, shock absorption, and maneuverability over roots, rocks, and loose surfaces.
- Wet Conditions: Slightly lower pressures can increase the tire’s contact patch, providing better grip in rain or on slippery surfaces.
Tire Type and Tubeless Systems
- Tubed Tires: These require sufficient pressure to prevent pinch flats.
- Tubeless Tires: Without an inner tube, tubeless setups are much less susceptible to pinch flats, allowing riders to run significantly lower pressures for enhanced grip and comfort without as much risk. This technique has revolutionized off-road and gravel cycling.
Finding Your Ideal Air Pressure for Bike Tires
While the factors above provide a framework, pinpointing your exact ideal pressure requires a bit of detective work and personal testing.
Manufacturer’s Recommendations (Tire Sidewall)
Every bike tire has a recommended pressure range printed on its sidewall. This range is a safe operating guideline, indicating the minimum and maximum PSI the tire can safely handle. Always stay within this range.
Starting Point Guidelines by Bike Type
Here are some general starting points. Remember, these are broad approximations and should be adjusted based on the factors above.
- Road Bikes: 80-120 PSI (Narrower tires often at higher end, wider at lower end. Tubeless can be 60-90 PSI).
- Hybrid/Commuter Bikes: 50-80 PSI.
- Mountain Bikes: 20-40 PSI (Lower for tubeless, higher for tubed; varies wildly with terrain and rider preference).
- Gravel Bikes: 30-60 PSI (Often lower with tubeless setups).
- Fat Bikes: 5-15 PSI.
The “Squeeze Test” vs. Pressure Gauge
While squeezing your tire might give you a rough idea, it’s highly inaccurate. A reliable pressure gauge is essential for precise and consistent inflation. Don’t rely on guesswork for something so critical to your ride.
Iterative Adjustment: Experiment and Refine
The best way to find your perfect pressure is to start with a recommended value (e.g., from your tire sidewall or a bike tire pressure calculator) and then adjust it slightly over several rides.
- Too High: If your ride feels harsh, bumpy, and you’re skidding in turns, try dropping the pressure by 2-5 PSI.
- Too Low: If your ride feels sluggish, squishy, or you’re experiencing rim strikes over bumps, add 2-5 PSI.
Pay attention to how the bike handles, how comfortable you are, and whether you’re getting any punctures. This approach allows you to truly dial in how much air pressure for bike tires provides the best experience for you.
How Much Air Pressure for Bike Tires?: Measuring and Adjusting
Accurate measurement and proper inflation technique are vital for consistent results. Knowing precisely how much air pressure for bike tires you have is the first step.
Essential Tools for Accurate Inflation
- Floor Pump with Gauge: This is the most practical tool for home use. Most come with an integrated pressure gauge.
- Digital Pressure Gauge: Highly accurate and useful for fine-tuning, especially for mountain and gravel bikes where small PSI changes make a big difference.
- Hand Pump: Essential for on-the-go adjustments and repairs, but less accurate for precise inflation.
Valve Types: Presta vs. Schrader
- Schrader Valves: These are the same as car tire valves, wider and sturdier. Most pumps can directly attach to them.
- Presta Valves: Thinner and common on road bikes and many mountain bikes. They have a small nut at the top that needs to be unscrewed before inflating. Make sure your pump head is compatible or use an adapter.
Inflation Technique
- Check Valve Type: Ensure your pump head is compatible with your tire’s valve.
- Open Valve (Presta Only): If you have a Presta valve, unscrew the small nut at the top until it’s loose, then tap it once to free the seal.
- Attach Pump Head: Securely attach the pump head to the valve. It should fit snugly.
- Inflate: Pump air into the tire. Watch the gauge.
- Check Pressure: Once you’ve reached your target PSI, remove the pump head. For Presta valves, screw the nut back down to seal it.
When to Check Your Tire Pressure
Tires naturally lose air over time. It’s recommended to check your tire pressure before every ride, or at least once a week, especially if you ride frequently. Temperature changes also affect PSI, so re-check after significant weather shifts.
Common Mistakes and Troubleshooting
Even experienced cyclists can make mistakes with tire pressure. Awareness can prevent issues.
Over-Inflation Risks
- Harsh Ride: Every bump feels exaggerated.
- Reduced Grip: Less tire contact with the road, especially on corners or wet surfaces.
- Increased Wear: Tire tread wears unevenly, especially in the center.
- Blowouts: Though rare, exceeding the max PSI can lead to tire failure.
Under-Inflation Risks
- Pinch Flats: The inner tube gets pinched between the rim and the tire.
- Sluggish Handling: The bike feels slow, unresponsive, and difficult to steer.
- Rim Damage: Hard impacts can damage rims, especially on rough terrain.
- Increased Rolling Resistance: You have to work harder to maintain speed.
- Tire Degradation: Sidewalls can crack prematurely due to excessive flexing.
Temperature Fluctuations
Air contracts in cold weather and expands in warm weather. A tire inflated indoors might be under-inflated when ridden outside on a cold day, or over-inflated if brought into a warm garage after a cold ride. Adjust accordingly.
Optimal Tire Pressure Guidelines for Different Bike Types
Here’s a general table of recommended PSI ranges. Always refer to your tire’s sidewall for the manufacturer’s specific minimum and maximum limits, and remember these are starting points.
| Bike Type | Tire Width (Approx.) | Recommended PSI Range (Tubed/Tubeless) | Key Considerations |
|---|---|---|---|
| Road Bike | 23-28mm | 80-120 PSI (Tubed) 60-90 PSI (Tubeless) |
Higher pressure for speed, lower for comfort/grip. |
| Gravel Bike | 35-45mm | 40-65 PSI (Tubed) 30-55 PSI (Tubeless) |
Balance of speed on road, grip on gravel. |
| Hybrid/Commuter | 30-40mm | 50-80 PSI | Comfort and durability for varied surfaces. |
| Mountain Bike (XC) | 2.0-2.3 inches | 28-40 PSI (Tubed) 22-35 PSI (Tubeless) |
Lower for traction, higher for rolling efficiency. |
| Mountain Bike (Trail/Enduro) | 2.3-2.6 inches | 25-35 PSI (Tubed) 20-30 PSI (Tubeless) |
Focus on grip, suspension, and puncture resistance. |
| Fat Bike | 4.0-5.0+ inches | 5-15 PSI | Very low for floatation over sand/snow, maximum grip. |
Note: Add 1-2 PSI for heavier riders (over 180 lbs) and subtract 1-2 PSI for lighter riders (under 130 lbs) as a general rule of thumb for these ranges.
Conclusion
Mastering your bike’s tire pressure is one of the easiest and most impactful ways to improve your cycling experience. By understanding the factors that influence optimal PSI and consistently checking and adjusting your tires, you’ll unlock a new level of comfort, control, and efficiency. Don’t underestimate the power of a perfectly inflated tire; it’s a small detail that makes a huge difference to every ride.
Frequently Asked Questions
What’s the recommended air pressure for my bike tires?
The ideal air pressure for your bike tires primarily depends on the type of bike, tire size, and rider weight. Always check the tire sidewall first, as it typically lists a recommended PSI (pounds per square inch) range from the manufacturer. Use this range as your starting point, then adjust based on your riding style and conditions.
What happens if my bike tire pressure is too high or too low?
If your tire pressure is too high, you might experience a harsh, uncomfortable ride, reduced grip, and increased risk of punctures from sharp objects. Conversely, if the pressure is too low, you risk pinch flats, sluggish handling, increased rolling resistance, and premature tire wear. Maintaining proper pressure is crucial for safety and performance.
How often should I check the air pressure in my bike tires?
It’s best to check the air pressure in your bike tires frequently, ideally before every ride or at least once a week, as tires naturally lose air over time. Using a dedicated bike pump with a built-in gauge or a separate digital gauge will ensure accurate readings. Regular checks help maintain optimal performance, comfort, and prevent flats.
How does my weight and riding style affect ideal tire pressure?
Your weight and riding style significantly influence your ideal tire pressure, even within the recommended range. Heavier riders generally require slightly higher pressure to prevent pinch flats and maintain tire shape, while lighter riders can often use lower pressures for increased comfort and grip. Off-road riding also typically benefits from lower pressures compared to smooth road cycling, offering better traction and shock absorption.
When you purchase a product through Amazon links on EllipticalKing.com, we may earn a small commission at no extra cost to you. This helps support the site and keep our content free. As an Amazon Associate, We earn from qualifying purchases