
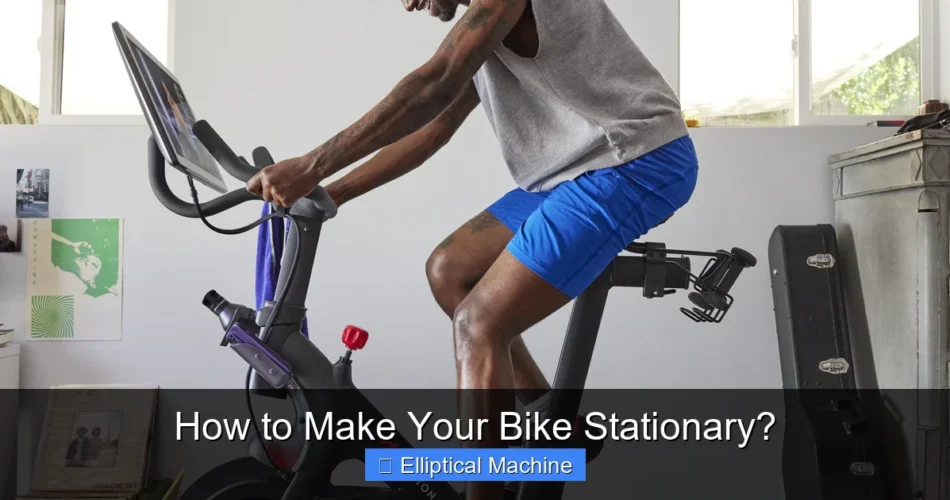
How to Make Your Bike Stationary? You can achieve this primarily by using an indoor bike trainer, a device that allows you to mount your existing bicycle and ride it in a fixed position, or by employing DIY methods for a more permanent setup. This technique transforms your outdoor bike into a valuable indoor fitness tool, offering a practical solution for year-round cycling regardless of weather conditions.
The practice of converting your bike for indoor use provides numerous health benefits and convenience. This method allows cyclists to maintain their fitness, practice specific training regimens, and enjoy the comfort of home while riding their familiar equipment.
Quick Answers to Common Questions
What’s the quickest way to make my bike stationary for indoor workouts?
The fastest and most popular method is using a bike trainer! You simply mount your bike’s rear wheel onto the trainer, and it provides resistance while keeping your bike perfectly stable.
Do I need to buy a whole new setup to make my bike stationary?
Not at all! While you can invest in dedicated indoor bikes, a smart and cost-effective solution is to use your existing bicycle with a bike trainer, letting you easily make your bike stationary for indoor use.
Is it difficult to convert my outdoor bike to make it stationary for indoor use?
Absolutely not! Most bike trainers are designed for quick and easy setup, so you can usually get your outdoor bike mounted and ready to ride indoors in just a few minutes.
📑 Table of Contents
- Understanding the Basics: How to Make Your Bike Stationary
- Choosing the Right Equipment for Making Your Bike Stationary
- Step-by-Step Guide: How to Make Your Bike Stationary with a Trainer
- DIY Solutions and Alternatives for Stationary Bike Setup
- Optimizing Your Indoor Cycling Experience
- Data Table: Comparison of Stationary Bike Setups
Understanding the Basics: How to Make Your Bike Stationary
Transforming your regular bike into a stationary setup opens up a world of indoor training possibilities. Before diving into specific equipment, it’s crucial to understand why people choose this approach and what fundamental components are involved in securing your bike.
Why Convert Your Bike for Indoor Use?
- Weather Independence: No more cancelled rides due to rain, snow, or extreme heat. Indoor cycling provides a consistent training environment.
- Safety: Eliminate the risks associated with outdoor cycling, such as traffic, potholes, and unpredictable road conditions.
- Focused Training: Indoor setups allow for highly structured workouts without interruptions from stoplights, hills, or turns, making it easier to hit specific power zones or heart rates.
- Convenience: Ride anytime, day or night, without the need to prepare for outdoor conditions. It’s often easier to fit a quick ride into a busy schedule.
- Cost-Effectiveness: For many, using an existing bike with a trainer is more affordable than purchasing a dedicated stationary bike or gym membership.
Key Components for Stability
The core principle behind making your bike stationary is to immobilize either one or both wheels, or to support the frame directly. The primary devices that facilitate this are:
- Bike Trainers: These are the most common solution. They typically attach to the rear wheel axle or directly to the bike’s drivetrain, lifting the rear wheel off the ground and providing resistance.
- Rollers: A less common but effective method, rollers consist of three drums over which your bike sits. Both wheels remain on the ground, and you must balance to ride, mimicking outdoor cycling more closely.
- Stability Stands: These are simpler, often more permanent solutions that hold the bike frame securely, preventing movement. They are less common for active riding and more for display or repair.
Choosing the Right Equipment for Making Your Bike Stationary
The market offers various devices designed to turn your road or mountain bike into a stationary cycling machine. Selecting the best option depends on your budget, training goals, and desired ride feel.
Bike Trainer Types Explained
Bike trainers are the most popular method for creating an indoor cycling setup. They vary significantly in price, complexity, and the riding experience they offer.
- Wheel-On Trainers:
- Description: These trainers attach to the quick-release skewer of your rear wheel, with the tire resting on a roller that provides resistance.
- Types:
- Magnetic Trainers: Use magnets to create resistance, which can often be adjusted manually via a lever on your handlebars. They are relatively quiet and affordable.
- Fluid Trainers: Use a fluid chamber for resistance, offering a smoother, more road-like feel and quieter operation than magnetic trainers. Resistance naturally increases with speed.
- Wind Trainers: Use a fan to create resistance, which is typically loud and offers a less progressive resistance curve. They are generally the least expensive option.
- Pros: Generally more affordable, easy to set up and take down, compatible with most bikes.
- Cons: Can cause tire wear, some are noisy, less realistic ride feel than direct drive.
- Direct Drive Trainers:
- Description: These trainers replace your bike’s rear wheel entirely. You remove your rear wheel, and the bike’s chain connects directly to a cassette mounted on the trainer.
- Pros: Excellent road feel, very quiet, highly accurate power measurement, no tire wear, often smart-enabled for virtual training platforms.
- Cons: More expensive, requires removing your rear wheel, may require a separate cassette purchase, heavier.
- Rollers:
- Description: A frame with three cylindrical rollers. Your bike rests on these rollers, and you pedal to make the wheels spin, requiring constant balance.
- Pros: Improves balance and bike handling skills, very realistic road feel, doesn’t attach to your bike’s frame.
- Cons: Steep learning curve for beginners, no inherent resistance (though some have added resistance units), can be noisy.
Essential Accessories for Your Setup
Beyond the trainer itself, a few accessories can significantly enhance your indoor cycling experience and protect your equipment:
- Trainer Mat: Protects your floor from sweat and dampens vibrations and noise.
- Front Wheel Riser Block: Lifts your front wheel to match the height of your raised rear wheel, leveling your bike for a more natural riding position.
- Sweat Guard: A fabric sling that attaches between your handlebars and seat post, protecting your bike’s frame and components from corrosive sweat.
- Fan: Crucial for staying cool during intense workouts, as there’s no natural airflow indoors.
- Connectivity (for Smart Trainers): If using a smart trainer, ensure you have a device (smartphone, tablet, computer) and apps like Zwift, TrainerRoad, or Rouvy.
- Power Strip/Extension Cord: For smart trainers and fans.
Step-by-Step Guide: How to Make Your Bike Stationary with a Trainer
Once you’ve chosen your preferred trainer type, the setup process is relatively straightforward. While specific instructions may vary slightly by model, the general steps remain consistent.
Setting Up a Wheel-On Trainer
This is arguably the most common and easiest method for converting your bike for indoor use.
- Replace Quick-Release Skewer: Many wheel-on trainers come with a specific quick-release skewer designed to fit securely into the trainer’s clamps. Remove your bike’s original skewer and install the trainer-compatible one. (Note: Some modern bikes with thru-axles may require a specific thru-axle adapter, sold separately).
- Mount the Bike: Position the trainer on a flat, stable surface. Lift the rear wheel of your bike and carefully align the ends of the quick-release skewer with the clamping mechanisms on the trainer. Securely tighten the clamps.
- Adjust Resistance Unit: Ensure the tire is centered on the roller of the resistance unit. Tighten the resistance unit until the roller makes firm contact with the tire. Typically, you want enough pressure to prevent slippage without over-compressing the tire. A good starting point is often two or three full turns after the roller first touches the tire.
- Install Front Wheel Riser: Place your front wheel on a riser block to level the bike.
- Check Stability: Give your bike a gentle wobble to ensure it’s securely fastened and stable before you start riding.
Installing a Direct Drive Trainer
Direct drive trainers offer a more immersive experience but require a bit more initial setup.
- Assemble the Trainer (if necessary): Some direct drive trainers require minimal assembly, such as attaching legs.
- Install a Cassette: Most direct drive trainers do not come with a cassette. You’ll need to purchase one that matches your bike’s drivetrain (e.g., 11-speed Shimano/SRAM). Use a cassette tool and chain whip to install it onto the trainer’s freehub body.
- Remove Your Bike’s Rear Wheel: Shift your bike into the smallest cog at the rear, then open the quick-release or undo the thru-axle. Carefully remove your rear wheel.
- Mount the Bike: Lift your bike and align the chain with the cassette on the direct drive trainer. Lower the bike so that the dropouts seat fully onto the trainer’s axle. Secure it using your bike’s quick-release skewer or thru-axle.
- Check Drivetrain Alignment: Pedal a few rotations to ensure the chain runs smoothly across the trainer’s cassette. You may need to make minor derailleur adjustments if shifting is rough (though this is less common).
- Install Front Wheel Riser: Place your front wheel on a riser block.
Using Rollers
Rollers offer a unique challenge and require more active riding.
- Set Up Rollers: Place the rollers on a flat, stable surface. Adjust the front roller so that it is positioned directly under your front wheel’s axle when your bike is on the rollers.
- Mount the Bike: Position your bike on the rollers. For safety, it’s highly recommended to start next to a wall, doorway, or sturdy piece of furniture you can lean on.
- Start Riding: Begin pedaling slowly. Look forward, not down at your wheels. Use a light gear initially. It takes practice to master balance. Keep a light grip on the handlebars.
DIY Solutions and Alternatives for Stationary Bike Setup
While dedicated trainers offer the best experience, there are alternative and DIY methods for making your bike stationary, especially if budget is a primary concern or for more permanent solutions.
Improvised Stands and Methods
These methods prioritize stability over a dynamic riding experience, often more suitable for casual exercise or permanent installations.
- Homemade Wooden Stand: You can construct a simple wooden frame that cradles your bike’s rear wheel or frame. This typically involves cutting and joining wood to create a stable, customized holder. Ensure the design accounts for your bike’s dimensions and provides robust support. For active riding, you would still need to elevate the front wheel and secure the bike even more rigidly to prevent tipping.
- Concrete Blocks or Bricks (with extreme caution): For a very temporary and static setup, one might prop the rear wheel onto sturdy blocks. However, this offers no resistance and significant instability. This method is generally not recommended for active cycling due to high risk of injury and bike damage.
- Permanent Anchoring: If you have an old bike you wish to dedicate solely to indoor use, you could potentially bolt the frame directly to a sturdy platform or floor. This is a irreversible modification and requires drilling into both the bike frame and the anchor surface. This approach is for dedicated setups and usually involves stripping down unnecessary components.
Safety Note: Any DIY solution must prioritize safety. Ensure your bike is absolutely stable and cannot tip over during use. Always test the stability thoroughly before engaging in strenuous activity. Improvised methods rarely provide the same level of safety, resistance control, or ride feel as purpose-built trainers.
Repurposing Old Bikes for Permanent Stationary Conversion
If you have an unused bike lying around, you might consider converting it into a permanently stationary bike. This often involves:
- Removing Unnecessary Components: Gears, brakes, and shifters may not be needed.
- Fixing Gearing: You might choose a single-speed setup for simplicity.
- Adding a Flywheel (Advanced): For a smoother pedaling experience similar to a spin bike, some advanced DIYers integrate a heavy flywheel from an old exercise machine, connecting it to the bike’s chain. This significantly increases complexity and safety considerations.
- Creating a Sturdy Base: Welding a robust stand or bolting the frame to a heavy, stable base is critical for preventing movement during intense pedaling.
Optimizing Your Indoor Cycling Experience
Once your bike is stationary, the next step is to make the most of your indoor training. A few considerations can transform a mundane ride into an engaging and effective workout.
Training Programs and Apps
Modern indoor cycling is highly interactive, especially with smart trainers.
- Virtual Riding Platforms: Apps like Zwift, Rouvy, and Fulgaz allow you to ride in virtual worlds or on real-world video routes, often with social interaction and structured workouts.
- Structured Workout Apps: TrainerRoad, Sufferfest (now Wahoo SYSTM), and similar platforms provide highly detailed training plans tailored to your fitness goals, with precise power targets and intervals.
- Basic Cycle Computers: Even without a smart trainer, a simple bike computer can track speed, distance, and cadence, allowing you to follow basic interval training.
Comfort and Ergonomics
Indoor cycling can feel different from outdoor riding due to lack of momentum and airflow. Adjustments can improve comfort.
- Bike Fit: Ensure your bike fit is correct. Small adjustments to saddle height or handlebar position can make a big difference over longer rides.
- Ventilation: A powerful fan is essential to simulate airflow and prevent overheating, which can drastically reduce performance and comfort.
- Hydration: Keep plenty of water or electrolyte drinks within reach. You’ll sweat more indoors.
- Entertainment: Music, podcasts, movies, or virtual riding apps can make the time fly by and keep you motivated.
Maintenance and Care for Your Stationary Setup
Regular maintenance ensures the longevity of both your bike and your trainer.
- Clean Your Bike: Sweat is corrosive. Regularly wipe down your bike frame, handlebars, and components after each ride, especially if you don’t use a sweat guard.
- Tire Pressure (Wheel-On Trainers): Ensure your tire is inflated to the recommended pressure before each ride to ensure consistent resistance and prevent tire wear. Consider using a specific trainer tire.
- Trainer Cleaning: Wipe down your trainer, especially areas exposed to sweat. Check for any loose bolts or worn parts periodically.
- Drivetrain Lubrication: Your chain will still get dirty and worn. Keep it clean and well-lubricated.
Data Table: Comparison of Stationary Bike Setups
Here’s a quick comparison of the common methods to make your bike stationary, helping you decide which approach suits your needs best.
| Feature | Wheel-On Trainer | Direct Drive Trainer | Rollers | DIY Stand (for static use) |
|---|---|---|---|---|
| Cost Range | $150 – $600 | $400 – $1500+ | $200 – $600 | Low (materials only) |
| Ride Feel / Realism | Good (varies by type) | Excellent, very smooth | Excellent (requires skill) | None (static) |
| Noise Level | Moderate to Low (Fluid quietest) | Very Low | Moderate | Silent (bike’s moving parts still make noise if ridden) |
| Setup Difficulty | Easy | Moderate (cassette install) | Moderate (learning curve for riding) | Moderate to High (construction) |
| Tire Wear | Yes (can use trainer tire) | No | No | No |
| Maintenance | Tire pressure, basic cleaning | Basic cleaning, cassette care | Basic cleaning | Minimal (stand itself) |
| Space Required | Moderate | Moderate | Moderate (can fold) | Dedicated space |
Making your bike stationary is an excellent investment in your fitness, offering flexibility and convenience that outdoor riding often cannot. Whether you opt for a high-tech smart trainer, a budget-friendly wheel-on model, or explore DIY alternatives, the opportunity to pedal indoors ensures your training never stops. Choose the method that best aligns with your goals and budget, and prepare to unlock a new dimension of cycling from the comfort of your home.
Frequently Asked Questions
What is the easiest way to make my bike stationary for indoor cycling?
The most common and easiest way is to use a bike trainer. This device clamps onto your bike’s rear wheel or replaces it, holding the bike securely in place while allowing the rear wheel to spin against a resistance unit. It transforms your outdoor bike into a stationary one for effective indoor workouts.
What equipment do I need to convert my regular bike into a stationary bike?
You primarily need a bike trainer, which provides stability and resistance. Depending on the trainer type, you might also need a front wheel block to level the bike and a trainer tire to reduce wear on your regular road tire. These components allow you to effectively make your bike stationary for indoor use.
Are there different types of trainers I can use to make my bike stationary?
Yes, there are several types, including wheel-on trainers (magnetic, fluid, wind), direct-drive trainers, and rollers. Wheel-on trainers are popular for their simplicity, while direct-drive trainers offer greater accuracy and a more realistic ride feel as you make your bike stationary. Rollers provide a more dynamic, balance-focused workout.
Will making my bike stationary damage my bicycle frame or components?
Generally, using a high-quality trainer correctly will not damage your bike frame. However, direct-drive trainers put stress on the rear dropouts, so ensure proper installation. Regular trainers can cause accelerated wear on your rear tire, which is why a dedicated trainer tire is often recommended when you make your bike stationary.
What are the benefits of using a stationary bike setup compared to a dedicated exercise bike?
A key benefit is that you get to train on your actual bike, maintaining your fit and feel. It’s also often more space-efficient and cost-effective than buying a separate exercise bike, especially if you already own a good road or mountain bike. This allows you to easily make your bike stationary and continue your training regardless of weather.
Can I use any type of bicycle to create a stationary bike setup?
Most road and mountain bikes can be made stationary using a trainer, but compatibility varies by trainer model. Some trainers require specific axle types or adapters, especially for thru-axles found on newer bikes. Always check the trainer’s specifications to ensure it’s compatible with your bike’s wheel size and axle type before attempting to make your bike stationary.
When you purchase a product through Amazon links on EllipticalKing.com, we may earn a small commission at no extra cost to you. This helps support the site and keep our content free. As an Amazon Associate, We earn from qualifying purchases